


I got a lovely break in my day last Thursday by running out of the office for ten minutes to meet Dad at Grand Central. He was on his way to lunch, I was working, but he was going to Toronto the next day and I had two small items that needed to get there, and he had just been to Paris and said he had some “small presents” for me. I love small presents!
We had enough time to quickly catch up on Paris, my new office, my brother Will’s move to Florida, and the Oscars (yay to the boobs song, boo to the number from Chicago, yay to Charlize Theron’s dancing), which is pretty impressive for ten minutes.
And my “small presents” were all baking-related. I think Dad & Michael are enjoying my new hobby even though they don’t really eat a lot of baked goods. They just love the accessories. Among the treasures in my small bag from a no-doubt lovely cooking & baking store in Paris (ah, Paris) was a cookie stamp!
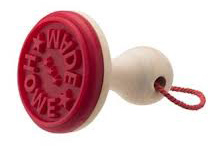
By Saturday I couldn’t hold out any longer; I had to use that stamp.
I did some research. There was a recipe that came with the stamp, which in hindsight I probably should have tried, but I poked around the web looking for options. I didn’t want to roll out cookies, which is a rather large investment of time in both the chilling dough and clean-up departments, so when I found a recipe for honey cookies that only required the rolling of dough into large balls and the squishing of said dough balls, I stopped looking.
(And for the record, the key seemed to be finding a recipe that didn’t use baking powder, which makes the cookies puff up and therefore ruins any imprint they might have on them.)
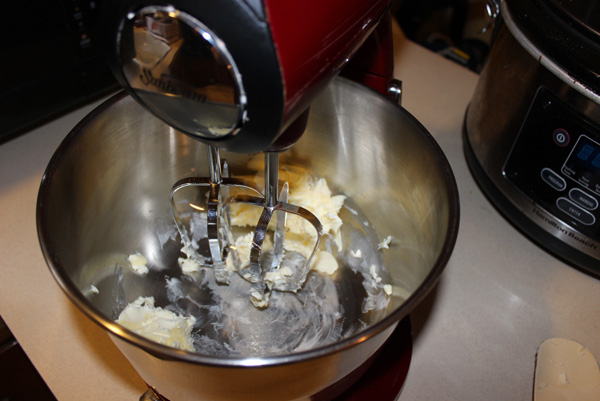
As with most cookies, the beginning step required butter. I put half a cup of softened butter in the stand mixer and had at it.
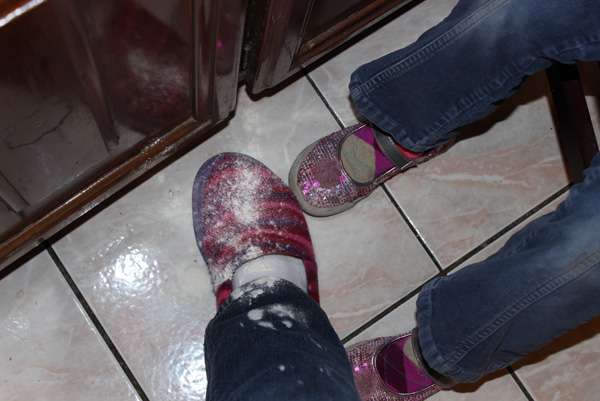
Next I had to add half the flour, and just as I was measuring it out, Miss Juliet came along to help. Before I could even move around to snap a picture of her leveling off the measuring cup, she’d dumped a nice chunk of it onto my leg and foot. (Yes, I was wearing slippers. I get cold!)
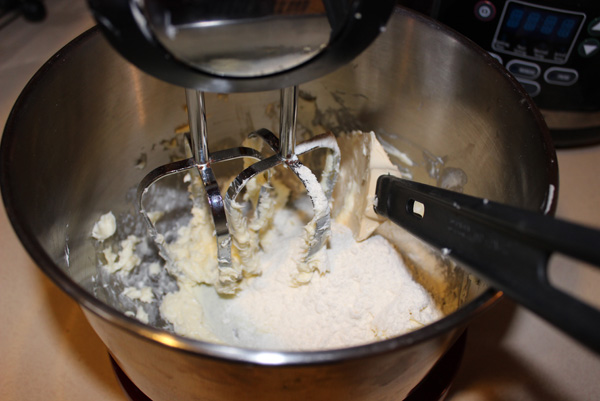
We cleaned that up, then poured in half the flour and beat that into the butter.
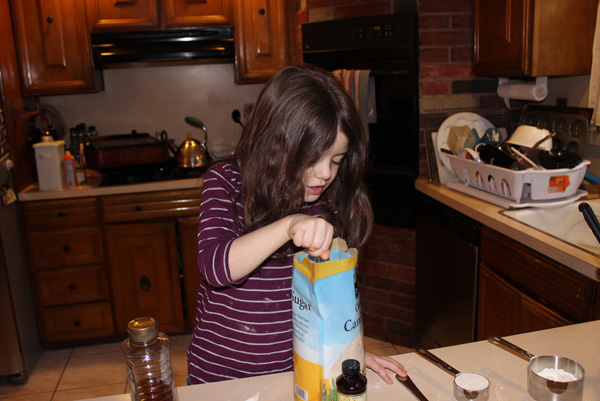
I saved the rest of the flour for later, and let Juliet scoop out the sugar and then pour it into the mixing bowl. She takes her baking assignments pretty seriously.
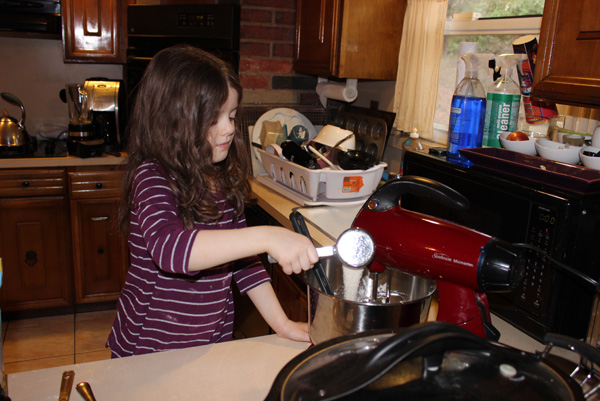
To that I added an egg yolk, honey, and vanilla. I did my best to spin that into something resembling cookie dough, but my confidence faltered, especially once I remembered that I still had half the flour waiting on the sidelines.
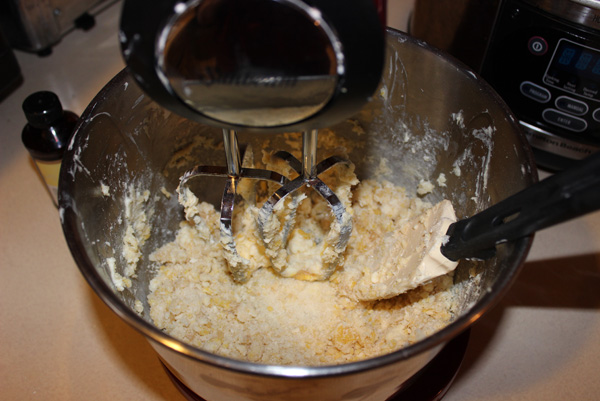
It just didn’t look like things were going to work out. I mixed in the rest of the flour, feeling even more doomed as the mixture got more and more dry, and then remembered the egg white sitting in a little bowl next to the sink. The recipe had called only for a yolk, but something told me not to pitch the white right away. (I like to think of it as my inner baking voice.) So I dumped the egg white in, mixed for a while, and finally had something resembling cookie batter to work with. (I did, however, forget to snap a photo of it.)
Next up: a system to work with the cookie stamp. It’s very large, larger in fact than most of the cookies I make. After a few practice runs I got a system going that worked fairly well.
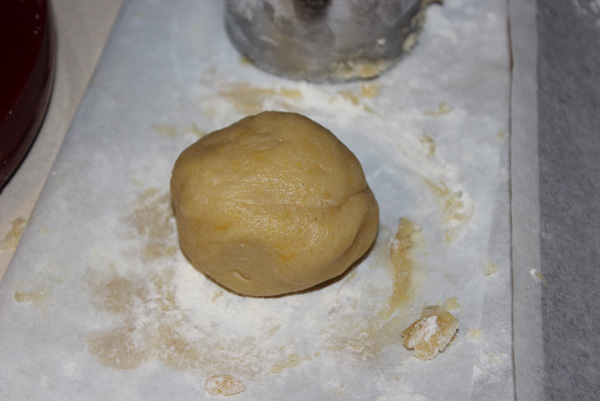
Step 1: On a folded sheet of parchment paper, spread out a little flour, then take a large chunk of dough and roll it into a (somewhat lumpy) ball.
Step 2: Flour the stamp.
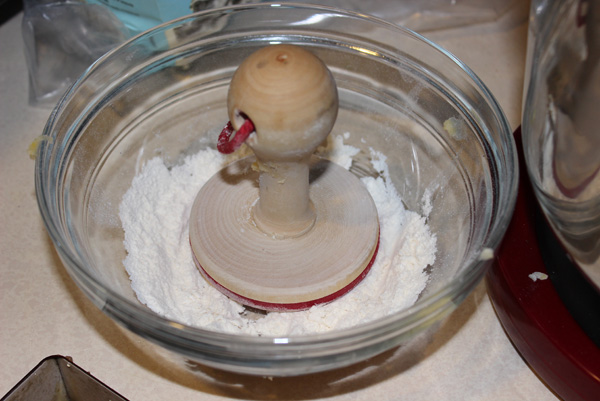
Step 3: Push the stamp down into the cookie ball, pressing it flat but thick.
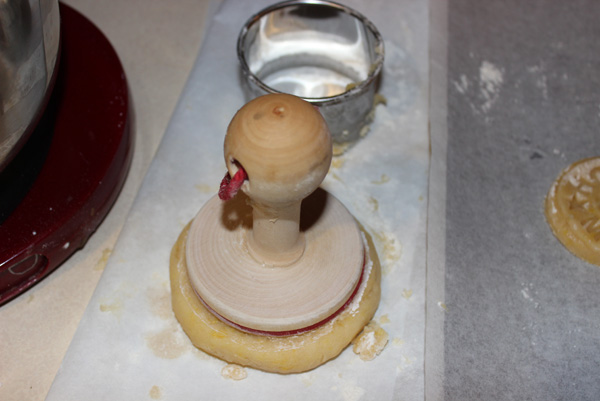
Step 4: Carefully remove stamp.
Step 5: Flour a round cookie cutter.
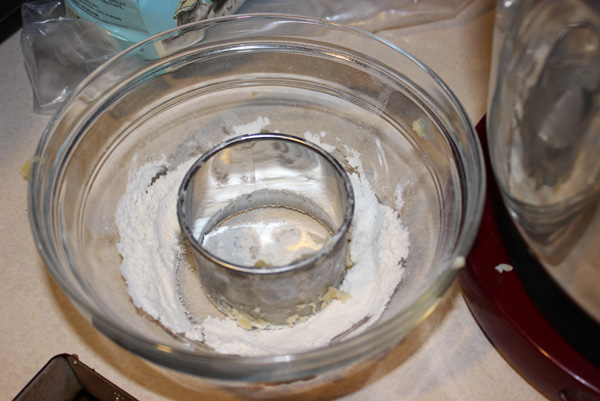
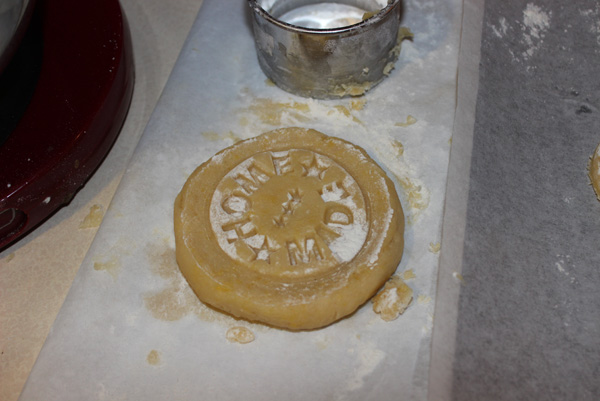
Step 6: Carefully place cookie cutter around stamped section of dough, as it magically fits PRECISELY around the lettering. Push down.
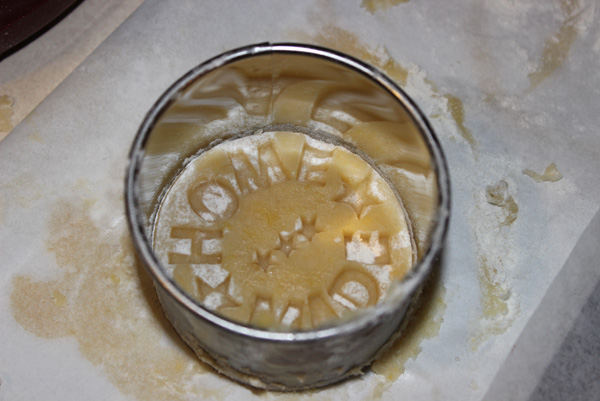
Step 7: Remove as carefully as possible and place on parchment paper on cookie sheet.

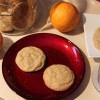
They looked okay. A little floury, but okay. I knew I wasn’t getting a full dozen out of this batch, but that was okay with me once I tasted the batter, which was unimpressive. (Keep in mind the last few weeks have been filled with the flavors of Meyer lemons, blood oranges, chai, and coffee-tinged cocoa.)
I checked the directions for baking, and felt completely abandoned when I read,
Bake in a 375 degree oven for about 6 minutes or until done.
Until done?
Will the edges get brown? Will the texture still be soft? What will happen to let me know I am “done”? Also, these cookies were crazy-thick.
I baked them for six minutes, and checked. Three more minutes. Checked. Two more minutes. The bottoms were starting to turn brown and i was nervous about burning them, so I took them out. And then later, I put them back, because they weren’t really done all the way through.
They didn’t look as good baked as they did raw, in terms of the cookie stamp.
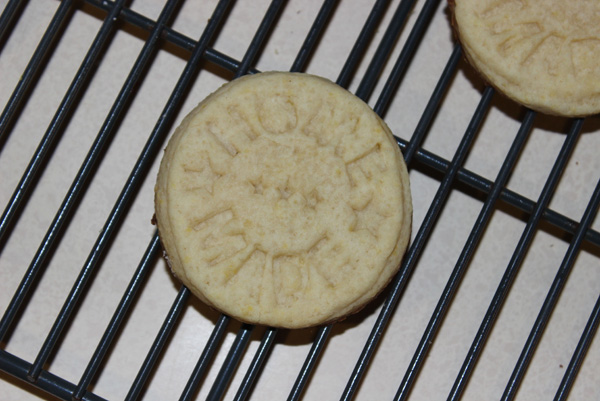
But some of that was the lighting and my lack of knowledge of how to best manipulate it.
We let them cool, and with low expectations, I suggested that it would be okay to eat them. The kids grabbed them and expressed some cookie love before running off to play. Then Bridget ate one, and told me that they were actually pretty good, and tasted like a light shortbread. With great skepticism, I took one.
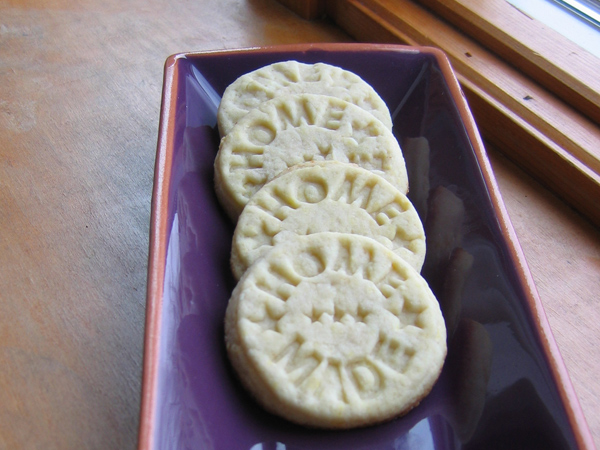
She was right! They’re actually pretty good! They could have used even more time in the oven, but they’re nice and light with that shortbread-y kind of feel and taste and the honey comes through in just the right way.
I will say, however, that even without the stamp, there would be no doubt in anyone’s mind who saw these cookies that they are homemade. Ha!

Is there a recipe for this cookie? Amount of ingredients, oven temp and time? This is exactly what I have been looking for!!
Hi! There is a link at the bottom of the post. https://www.cooks.com/recipe/yq5ro7ol/honey-stamped-cookies.html